Back from my first visit to Portland, Oregon I got really inspired by the city, especially the rugged Pacific Northwest landscape, the grey colors of the sky, the Willamette River running right through town and the people that make the city unique. The first thing I was motivated to do upon my return was to create something inspired by Mark Weaver’s work starting with a beautiful photo as the background and some less saturated tones. I have never created anything of this nature so it was a great opportunity for me to learn and share in a Photoshop tutorial.
So in this tutorial I will walk you through the process behind my Inspired By Oregon artwork.
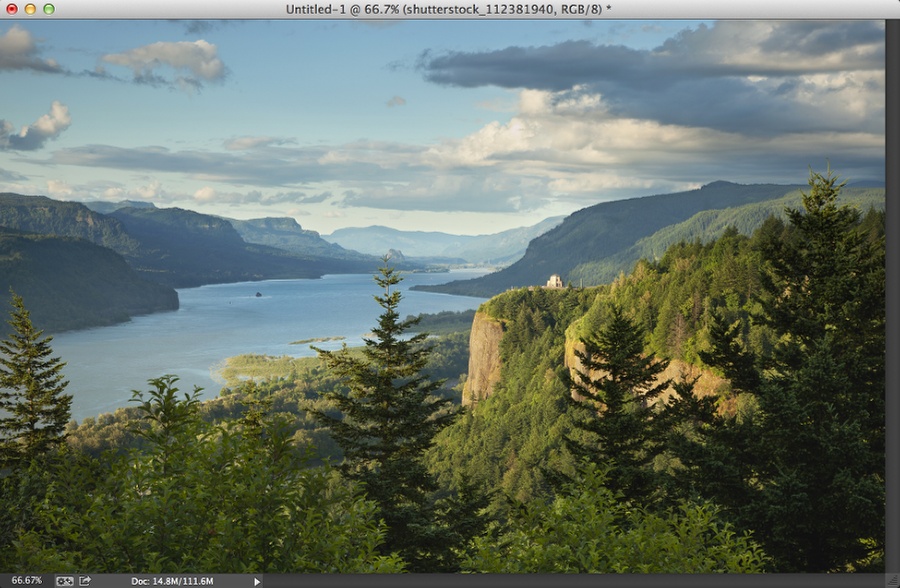
Step 1
Open Photoshop and create a new document I am using 2880×1800, so I can use as my desktop wallpaper. After that it’s time to find a photo for your background. I am using one from Shutterstock titled “Columbia River Gorge in northwestern Oregon showing the Vista” by Dan Thornberg.
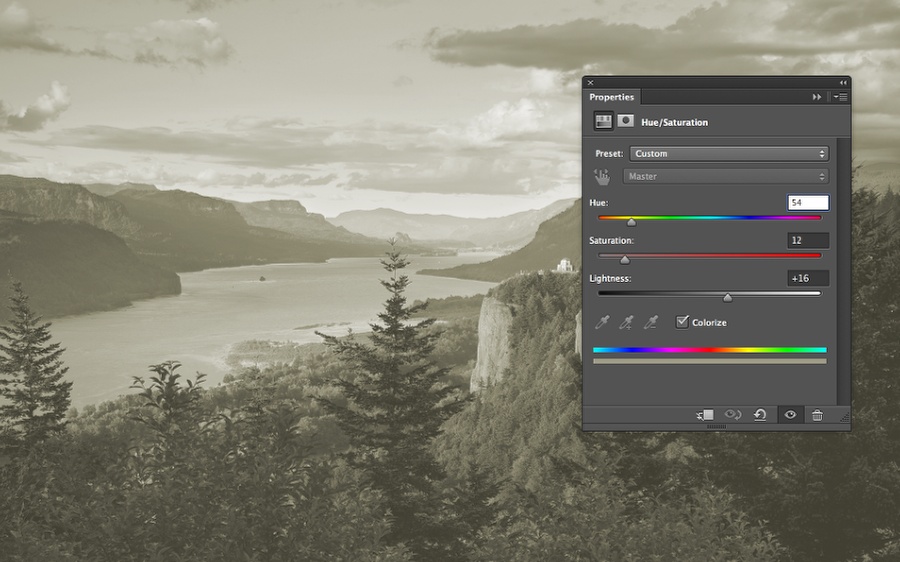
Step 2
Go to Layer>New Adjustment Layer>Hue and Saturation. Change the Hue to 54, Saturation to 12 and Lightness at 16. Also select Colorize. Remember that these values might change depending on the image you will be using.
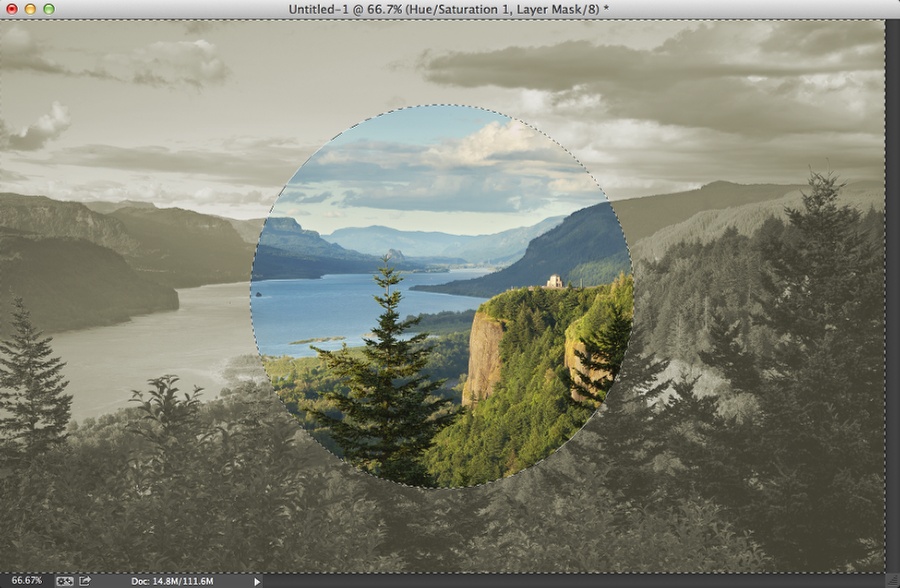
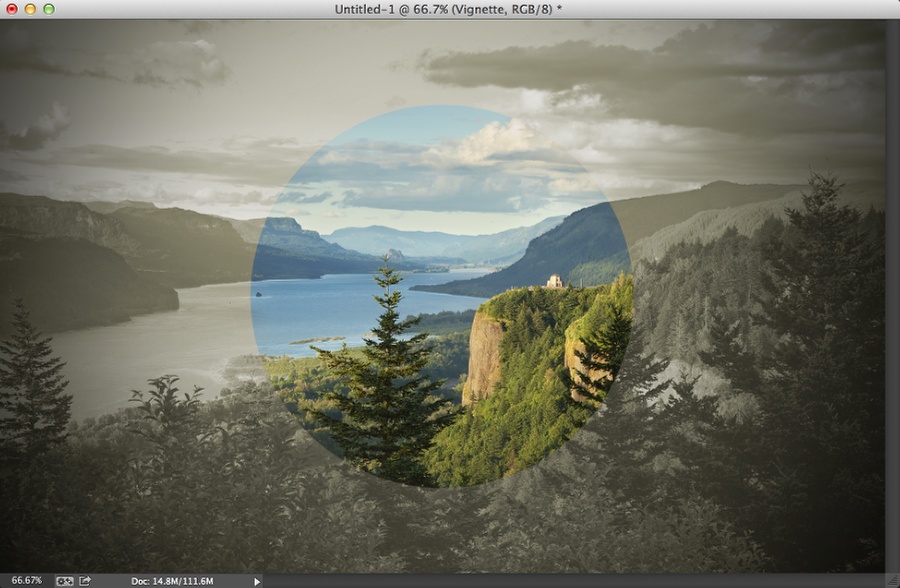
Step 3
Select a circle in the middle of the screen and then paint with black on the mask layer of the adjustment layer to make the circle area have the original colors.
Step 4
Add a new layer on top of the others and paint it with black. After that with the Brush Tool (B) and a very soft brush, paint with white in the center. Try to achieve something like the image below.
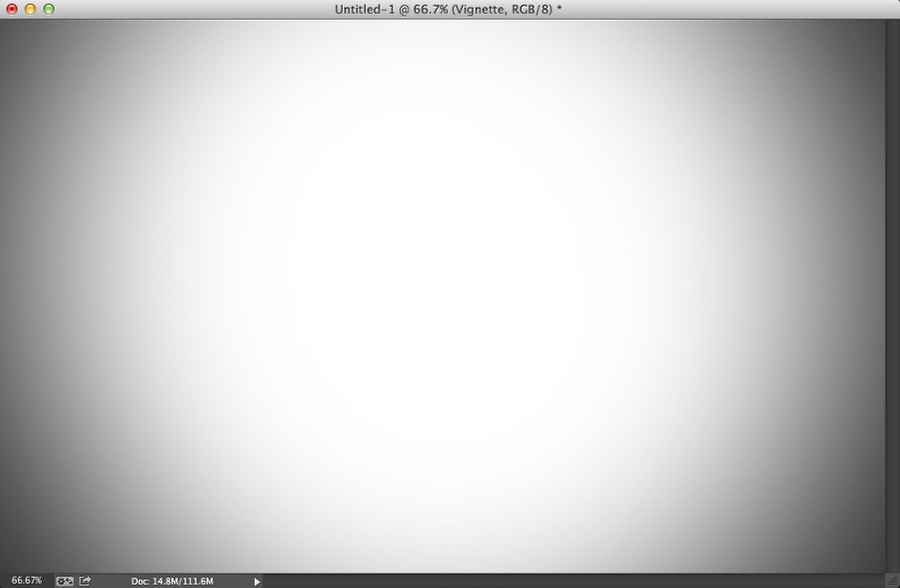
Step 5
Change the Blend Mode to Multiply to create a nice vignette effect.
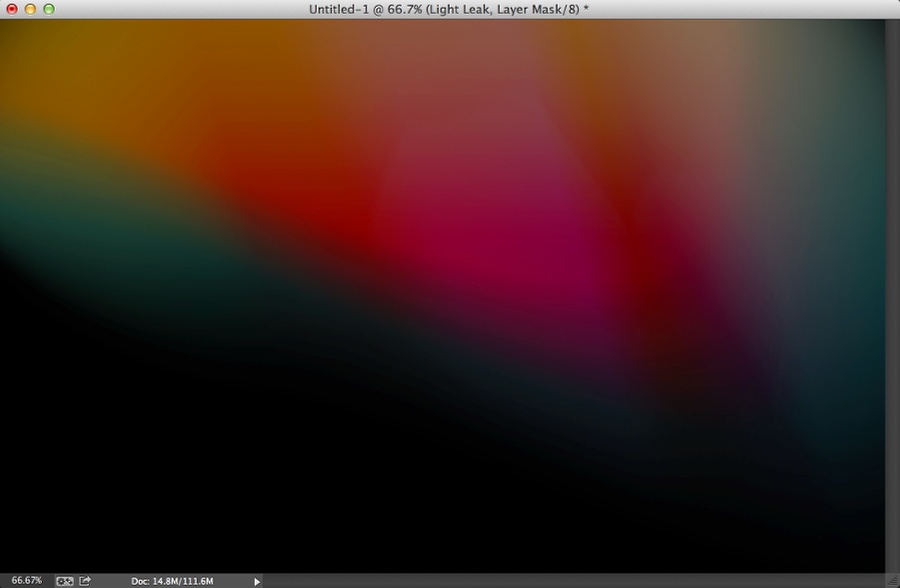
Step 6
Try to find a nice light leak effect online. The one I am using is from an old tutorial and I created it using Pixelmator.
Step 7
Delete the circle area used for the mask during the step 3 and delete the circle in the middle of the screen.
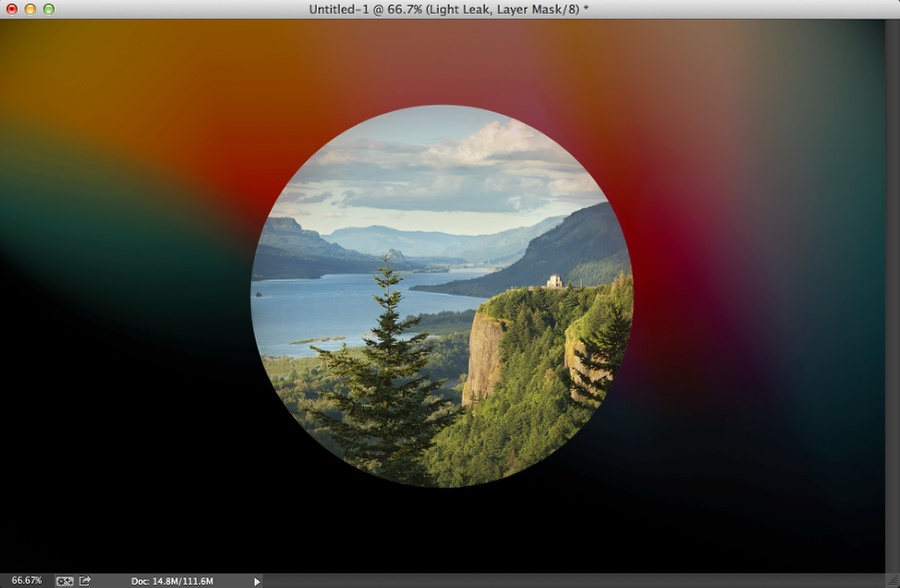
Step 8
Change the Blend Mode to Linear Dodge at 90%.

Step 9
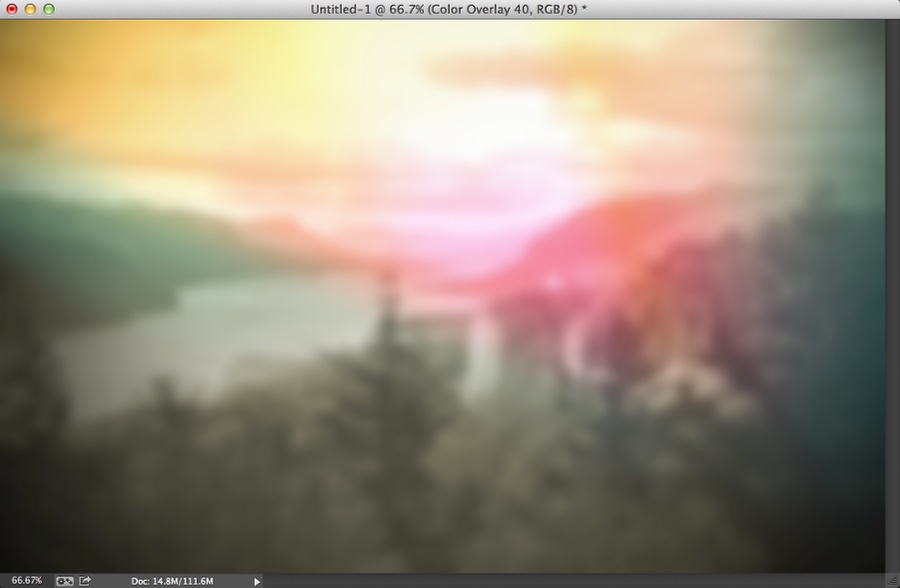
Duplicate all layers and then merge all new layers into one. You can do that by clicking Command+Alt+Shift+E. After that go to Filter>Blur>Gaussian Blur. Use 10 for the radius. Change the Blend Mode to Overlay at 40% opacity.
Step 10
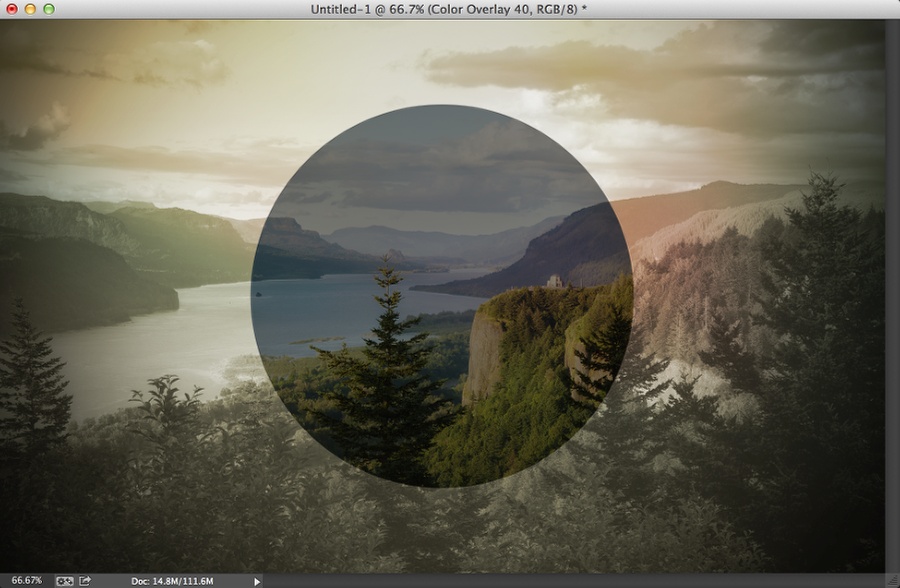
Create a black circle in the area the photo was masked. Use Multiply at 50%. Also hide the Light Leak layer.
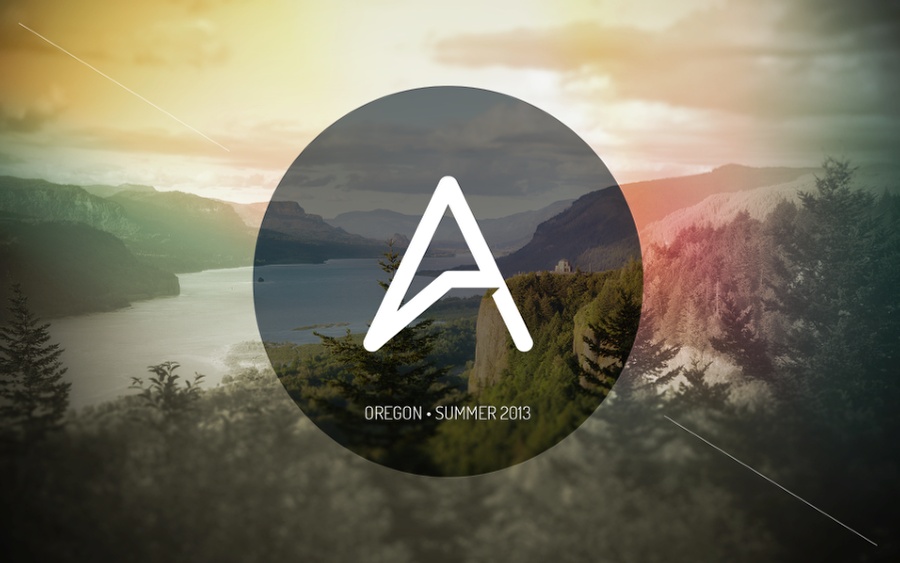
Step 11
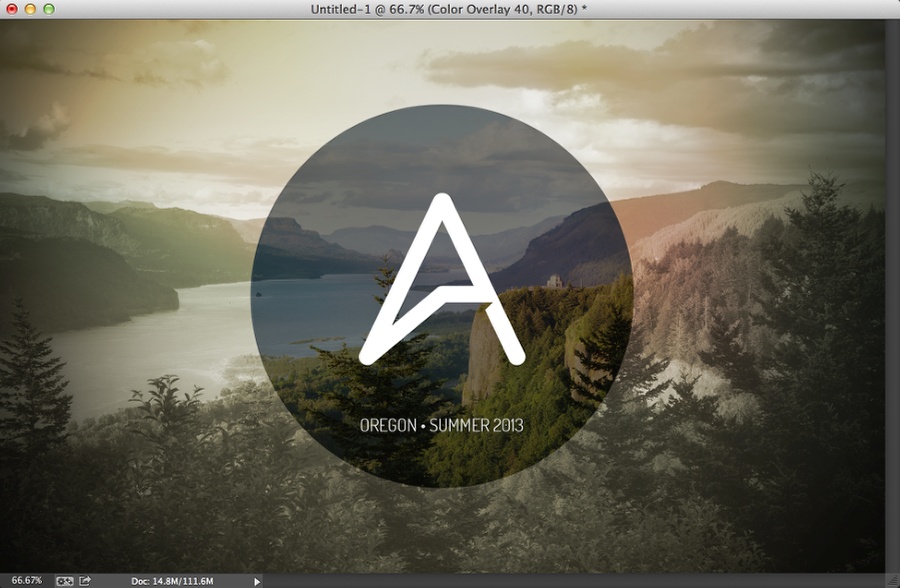
Add your logo, in my case I added the “A” and then “Oregon • Summer 2013”.
Step 12
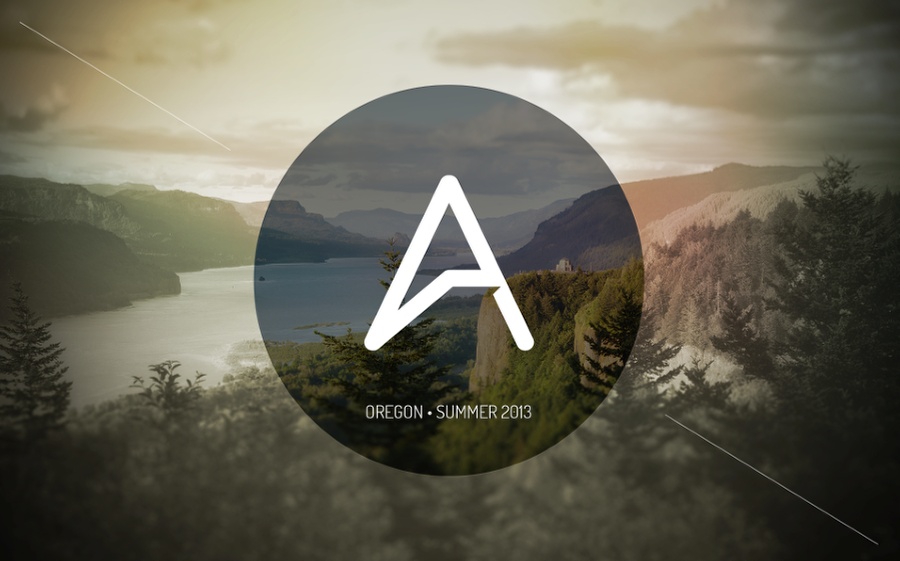
Select the background photo and go to FIlter>Blur>Tilt-Shift. Move the dashed lines up and down a little bit to make the zoom less strong in the center.

Conclusion
You can add some details like I’ve seen some designs out there using it. You can also make the light leak visible and reduce the opacity to keep the design a little bit more colorful. The idea for me was more about trying to learn how to create an artwork like that, especially because I think it captures the Oregon feeling, from the little I saw during this past few days.
I hope you have fun playing with this style, it works really well especially for posters. Have fun!
Download Photoshop file
Click here to download the Photoshop file used for this tutorial